

Step 1: Create a database
Create a new database to write data to, or skip this step if you already have one.- Log in to your MotherDuck account.
- Click the plus icon next to Attached Databases.
- Enter a name for the database.
Step 2: Create an access token
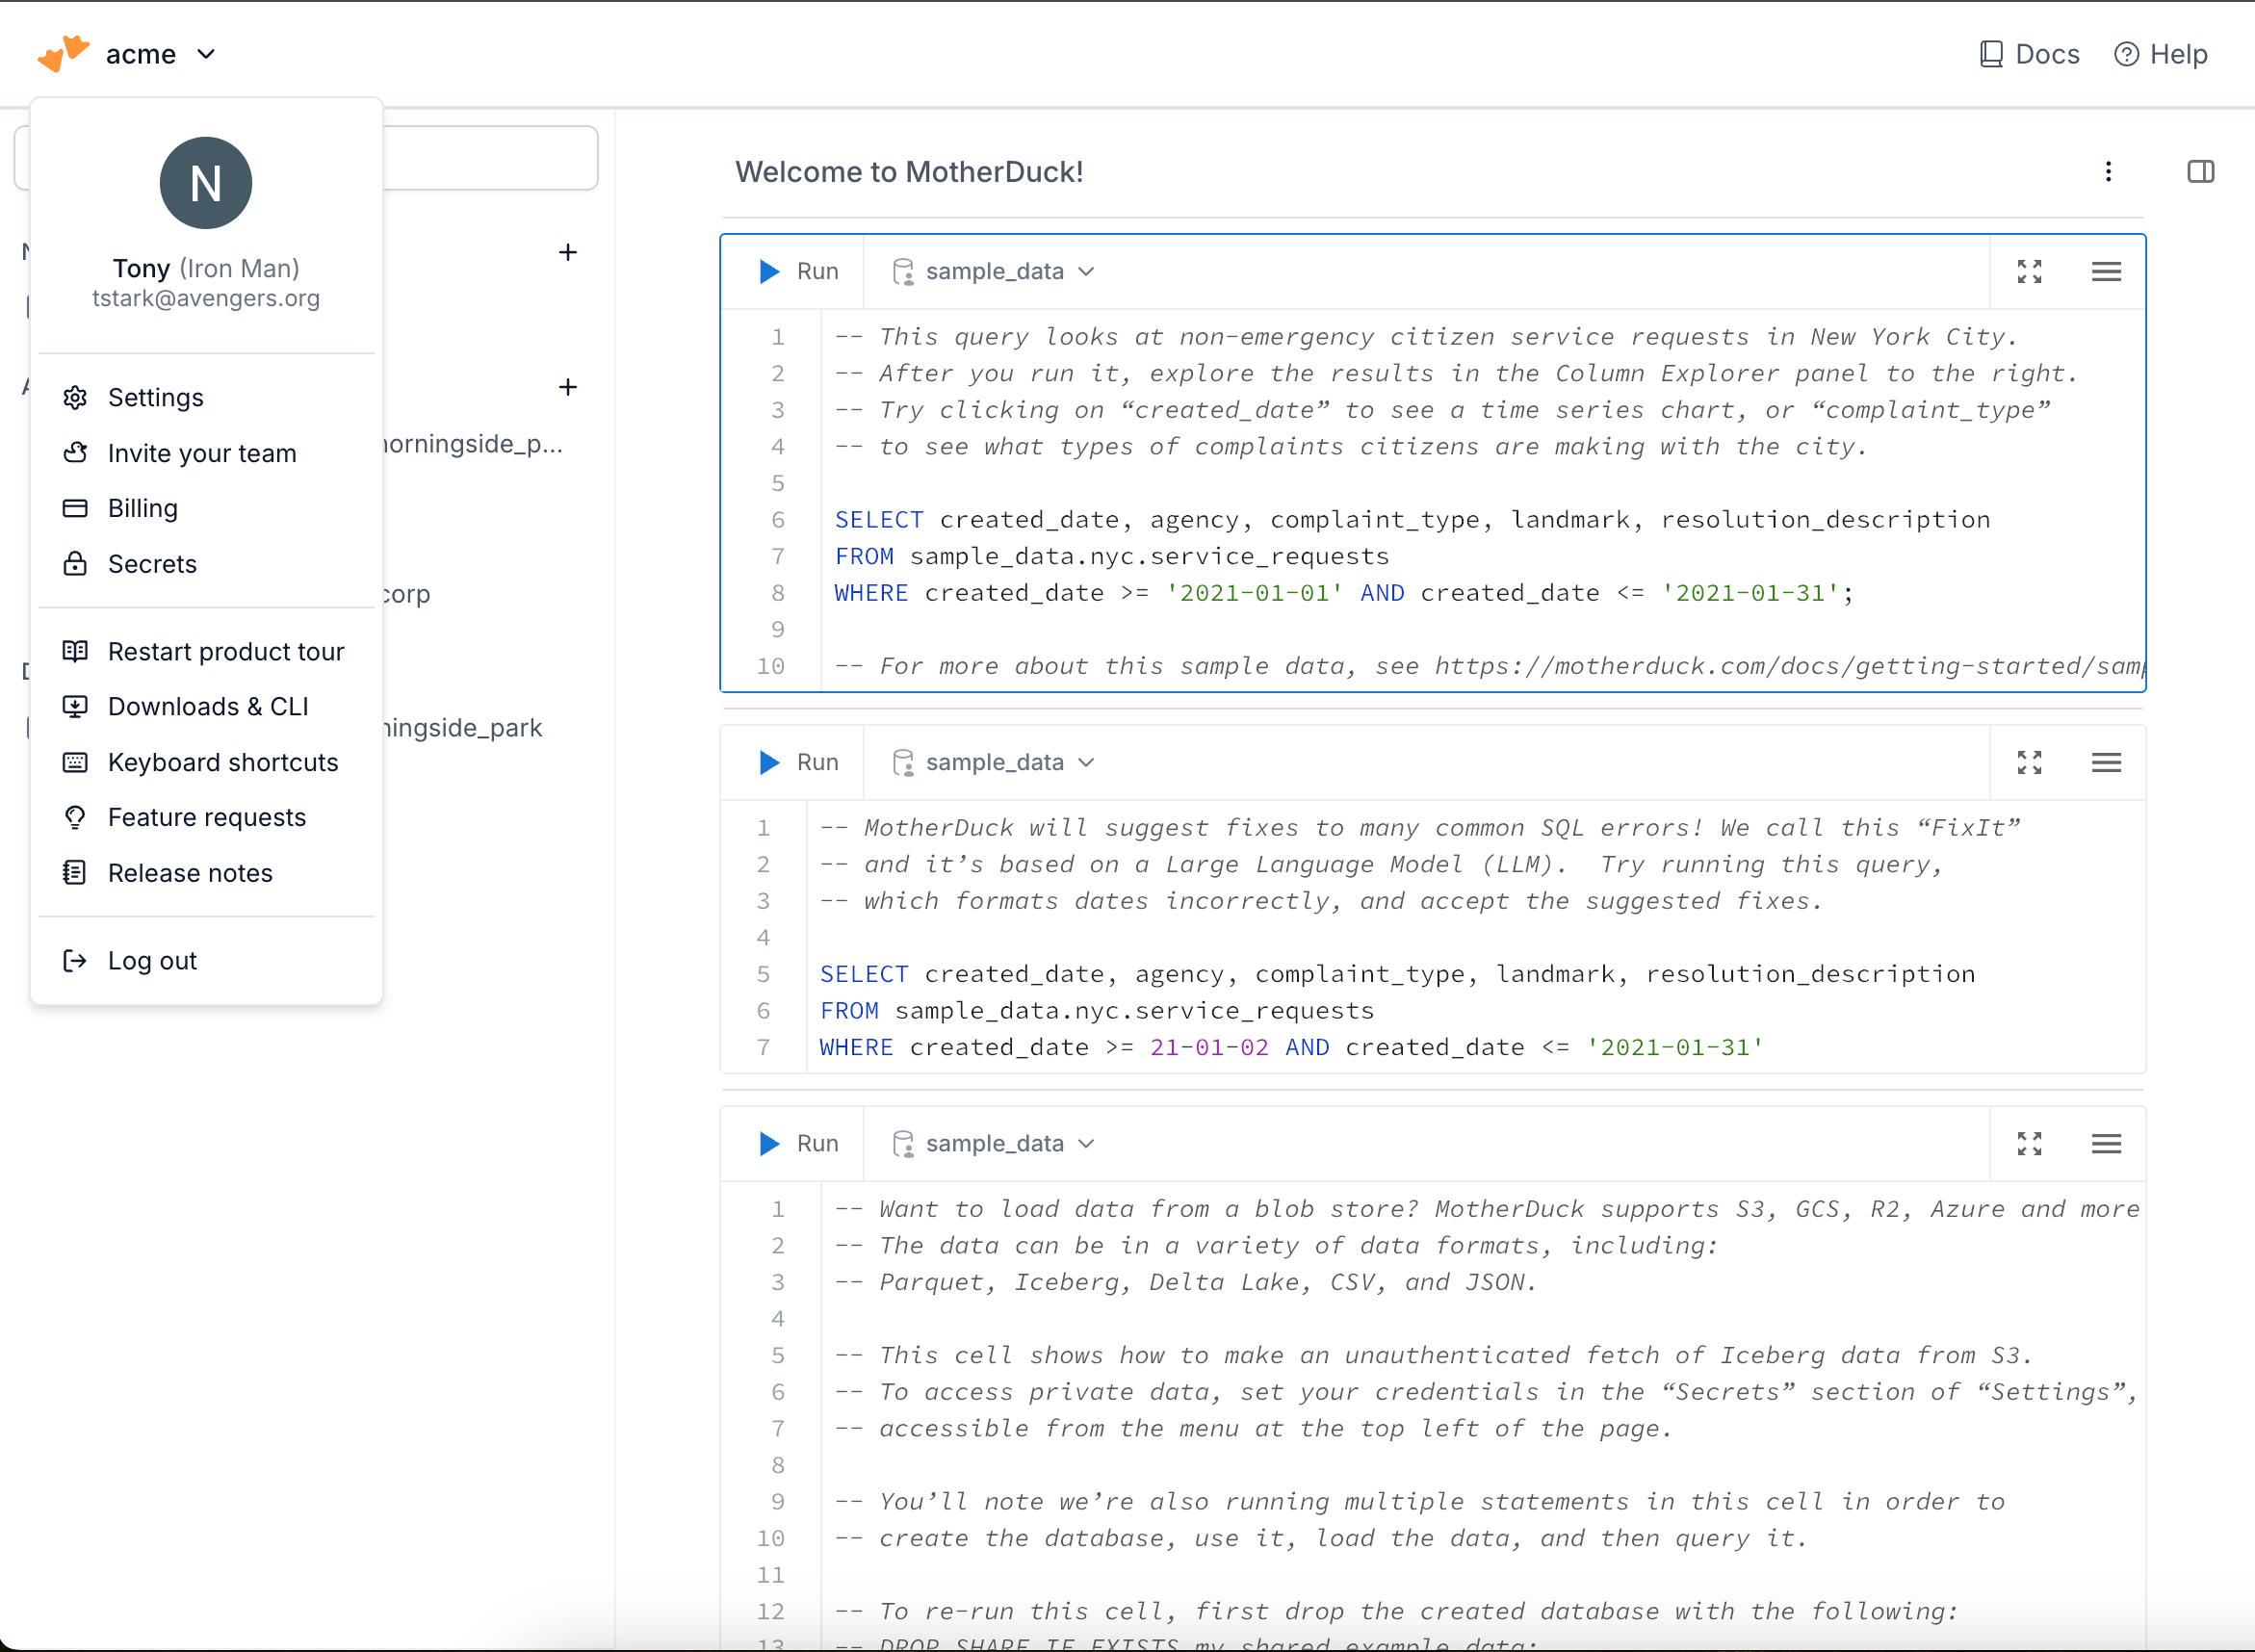
- Open the navigation dropdown and click Settings.
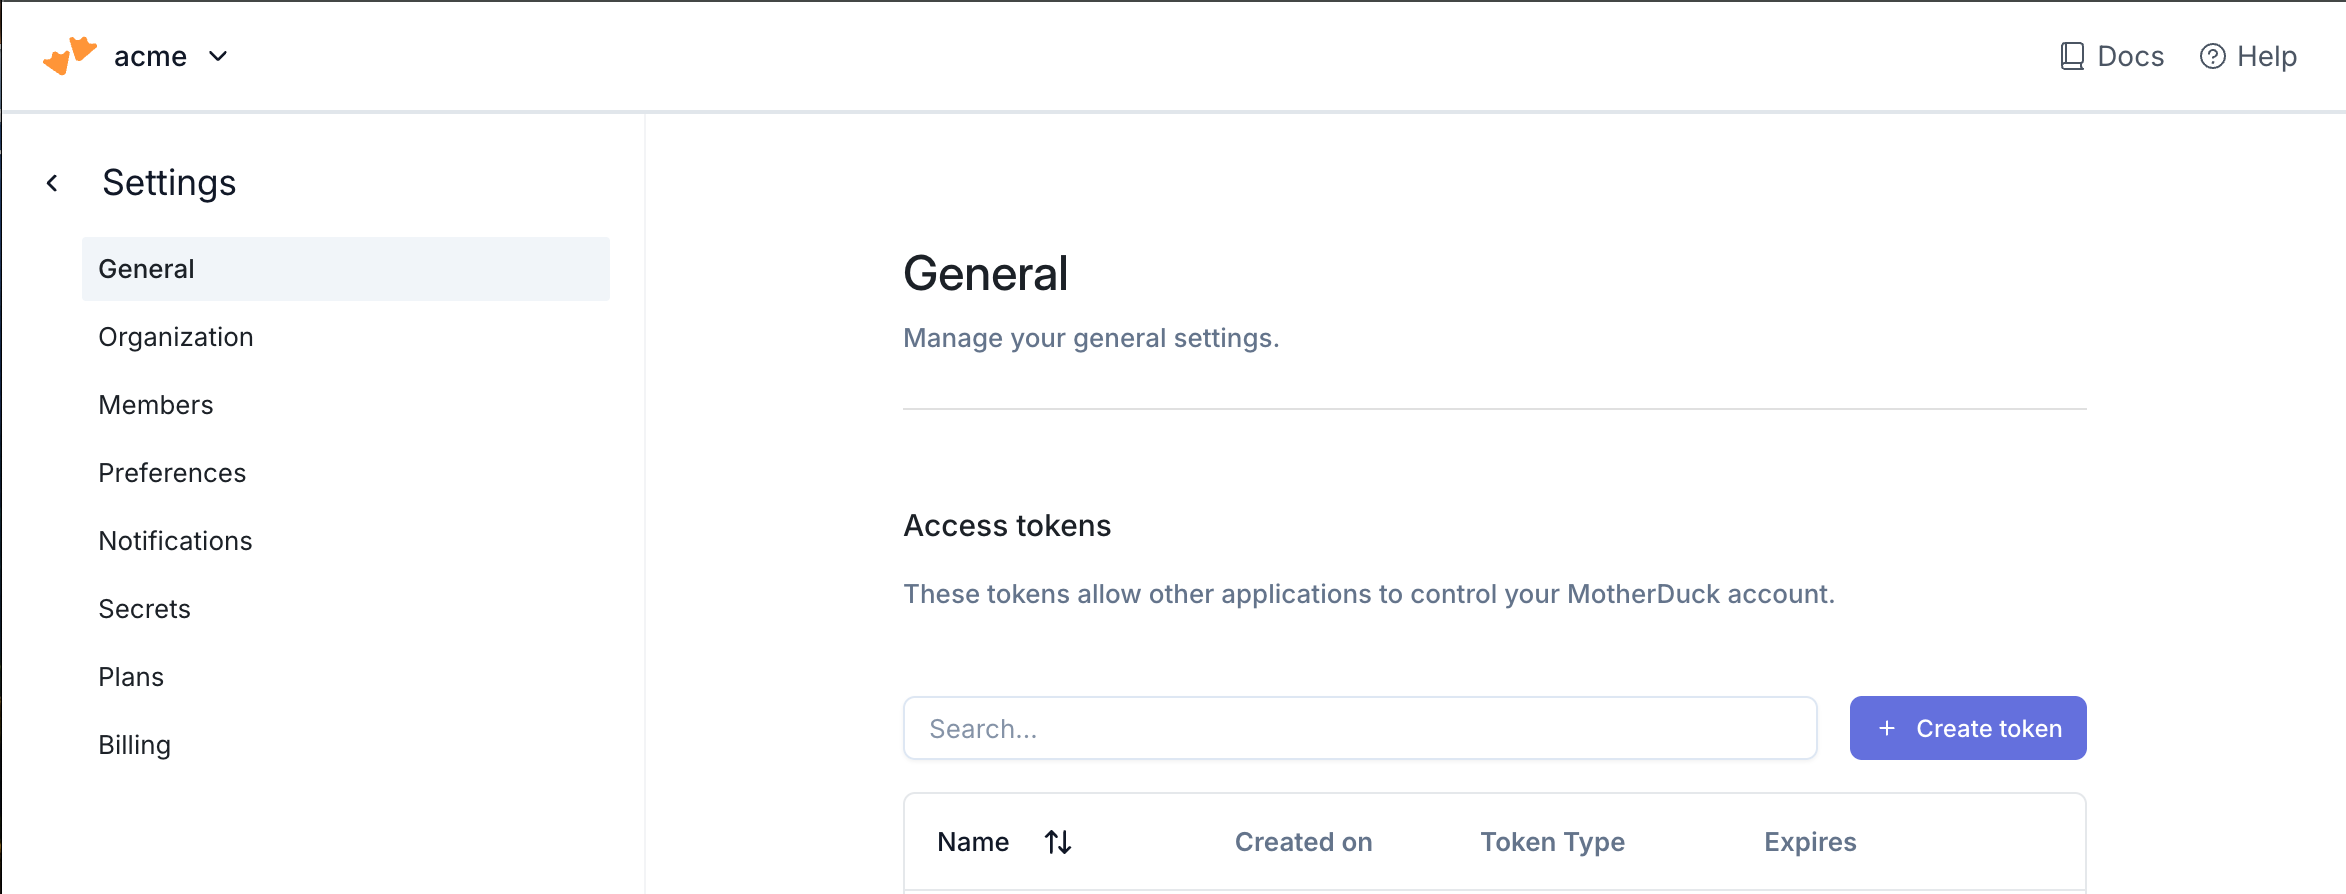
- Click Create token.
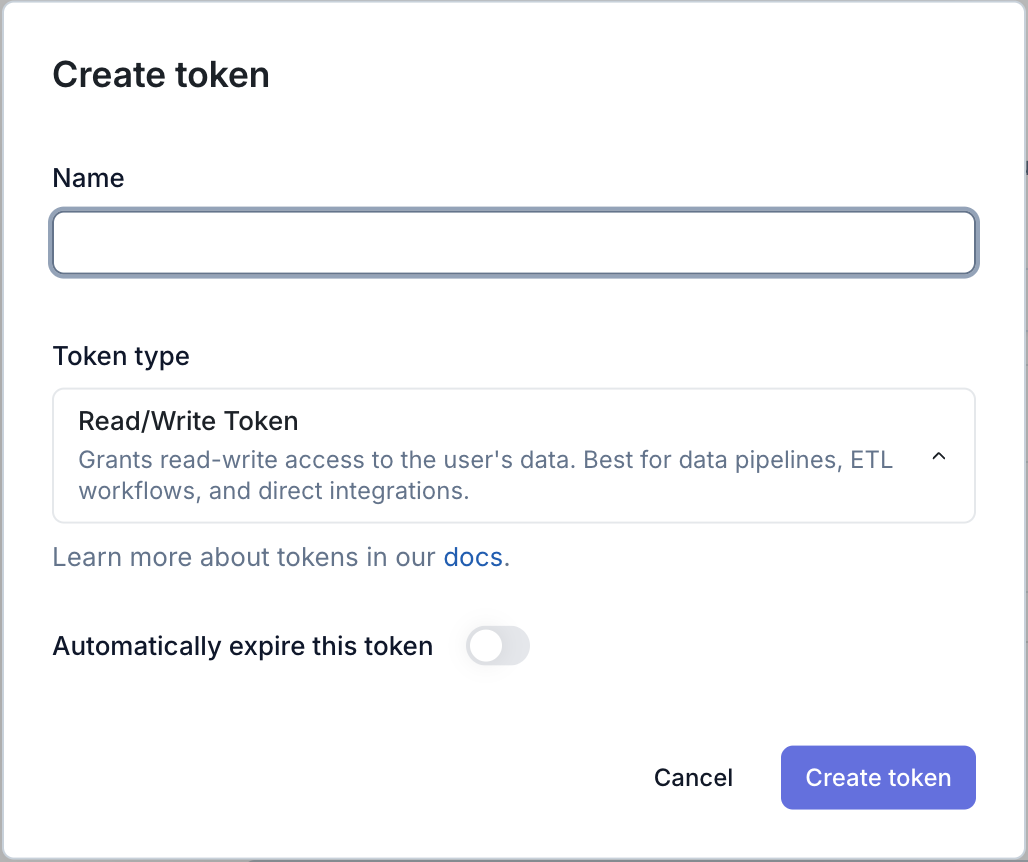
- Name the token with a descriptive comment, and set the token lifetime. A longer lifetime reduces how often you need to update the destination configuration.
- Set Token Type to Read/Write Token.
- Click Generate.
- Copy and securely store the token shown in the confirmation popup.
Step 3: Add your destination
Securely share your database name, your chosen schema name, and the access token with us to complete the connection.Permissions checklist
- The access token is a Read/Write Token.
- The token lifetime aligns with your credential rotation policy.
- The target database already exists in MotherDuck.
FAQ
How is the MotherDuck connection secured?
How is the MotherDuck connection secured?
Authentication uses a MotherDuck access token. You generate a dedicated Read/Write token in Settings and provide it during setup, which grants scoped access without sharing your account credentials.
How do I update my access token?
How do I update my access token?
Generate a new token in Settings, update the destination configuration with it, then revoke the old token.
Do I need to pre-create the schema?
Do I need to pre-create the schema?
No. The schema is created automatically during the first sync.