

Prerequisites
- If your Redshift security posture requires IP whitelisting, have the data-syncing service’s static IP available during the following steps. It will be required in Step 2.
- By default, Redshift Serverless authentication uses role-based access. You will need the trust policy prepopulated with the data-syncing service’s identifier to grant access. It should look similar to the following JSON object with a proper service account identifier:
Network allowlistingCloud-hosted (US):
35.192.85.117/32Cloud-hosted (EU): 104.199.49.149/32If private-cloud or self-hosted, contact your Thanx representative for the static egress IP.How authentication worksTwo distinct identities are involved: an AWS IAM role in your account (created in Step 3), which holds the S3 staging permissions and is allowed to call
redshift-serverless:GetCredentials on your workgroup, and a Redshift database user (created in Step 1) derived from that IAM identity.The database username format depends on the authentication method: IAMR:<role-name> for an IAM role (the final segment of the role ARN), or IAM:<user-name> for an AWS user with an HMAC access key.Step 1: Create the database user in Redshift Serverless
- Connect to Redshift Serverless using an SQL client.
- Create the user, quoting the identifier because of the colon (replace
<role-name>with the final segment of your IAM role ARN, or use theIAM:<user-name>format for HMAC access key authentication).
If the user already existsRedshift Serverless auto-creates this user on the first connection attempt. If a prior connection was already made, the
CREATE USER statement fails with “user already exists” — skip it and proceed to the grant below.- Grant user
createandtemporaryprivileges on the database.createallows the service to create new schemas andtemporaryallows the service to create temporary tables.
The schema will be created during the first syncThe schema name supplied as part of Step 4 will be created during the first connection. It does not need to be created manually in the destination ahead of time.
Step 2: Whitelist connection
- In the Redshift console, click Workgroups, and make a note of the workgroup name.
- Select the workgroup you would like to connect.
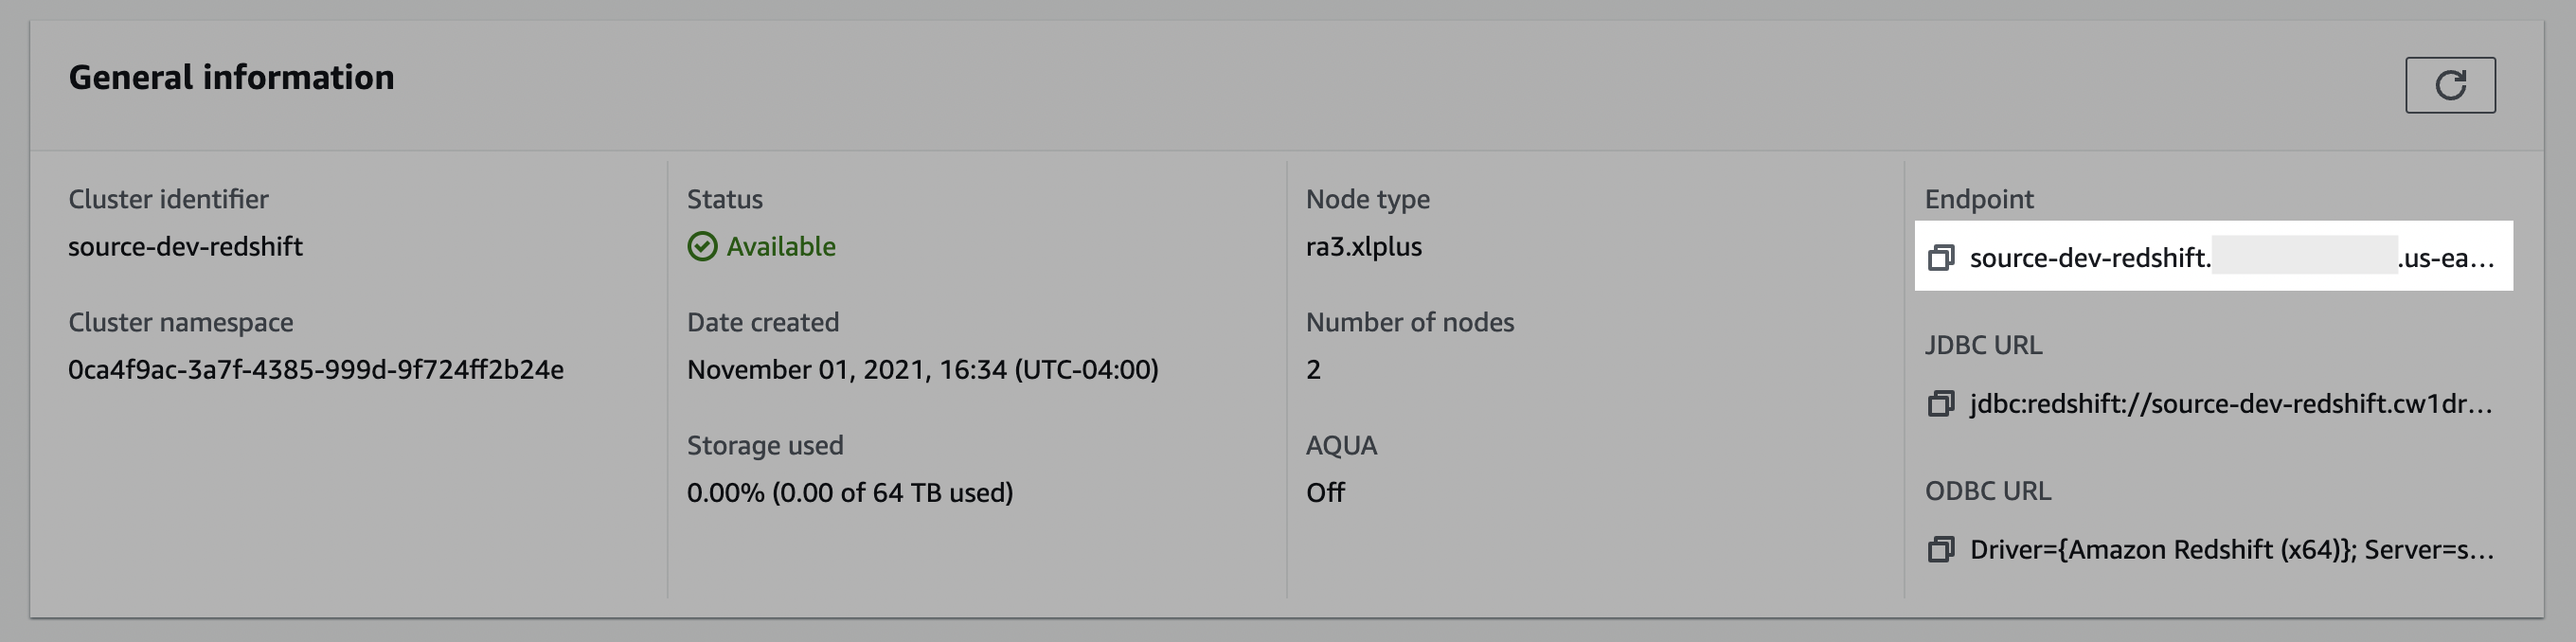
- In the General information pane, make note of the Endpoint details. You may need to use the copy icon to copy the full details to discover the full endpoint and port number.
- Click the Properties tab.
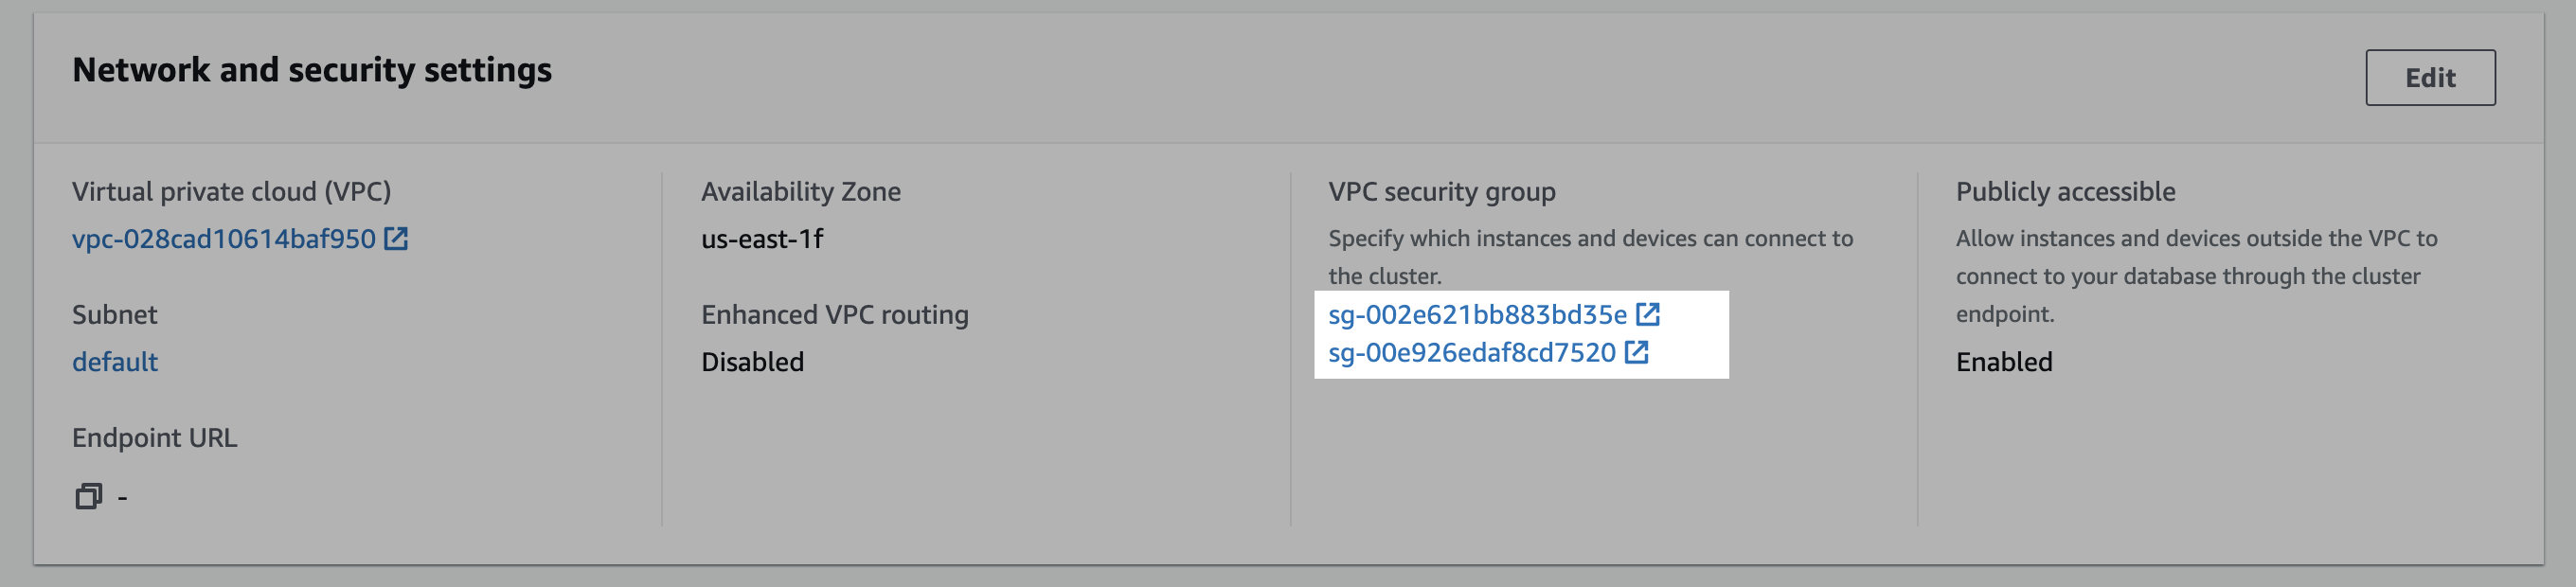
- Scroll down to the Network and security settings section.
- In the VPC security group field, select a security group to open it.
 7. In the Security Groups window, click Inbound rules.
8. Click Edit inbound rules.
9. In the Edit the Inbound rules window, follow the steps below to create custom TCP rules for the static IP:
7. In the Security Groups window, click Inbound rules.
8. Click Edit inbound rules.
9. In the Edit the Inbound rules window, follow the steps below to create custom TCP rules for the static IP:
- Select Custom TCP in the drop-down menu.
- Enter your Redshift port number. (likely
5439) - Enter the static IP.
- Click Add rule.
Step 3: Create a staging bucket
Create staging bucket
- Navigate to the S3 service page.
- Click Create bucket.
- Enter a Bucket name and modify any of the default settings as desired. Note: Object Ownership can be set to “ACLs disabled” and Block Public Access settings for this bucket can be set to “Block all public access” as recommended by AWS. Make note of the Bucket name and AWS Region.
- Click Create bucket.
Optional: add a short retention lifecycle policyYou may configure a lifecycle rule on the staging bucket to automatically delete objects older than 2 days, since the bucket is not used to persist data. In the bucket’s Management tab, click Create lifecycle rule, and set an expiration action for current versions of objects with a 2-day age. Transfer logic automatically cleans up files after each transfer completes, so this step is optional.
Create policy
- Navigate to the IAM service page, click on the Policies navigation tab, and click Create policy.
- Click the JSON tab, and paste the following policy, being sure to replace
BUCKET_NAMEwith the name of the bucket chosen above, andREGION_NAME,ACCOUNT_ID, andWORKGROUP_NAME_OR_IDwith the proper Redshift Serverless values.- Note: the first bucket permission in the list applies to
BUCKET_NAMEwhereas the second permission applies only to the bucket’s contents —BUCKET_NAME/*— an important distinction.
- Note: the first bucket permission in the list applies to
JSON policy
KMS encryption (optional)If your S3 staging bucket uses KMS encryption (CMK), add the following statement to the Replace
Statement array of your IAM policy to allow data encryption and decryption with your KMS key. Encryption with SSE-C is not currently supported.REGION_NAME, ACCOUNT_ID, and KEY_ID with your values.- Click through to the Review step, choose a name for the policy, for example,
transfer-service-policy(this will be referenced in the next step), add a description, and click Create policy.
- IAM role (recommended)
- AWS user with HMAC access key
Create role
- Navigate to the IAM service page.
- Navigate to the Roles navigation tab, and click Create role.
- Select Custom trust policy and paste the provided trust policy (from the prerequisite) to allow AssumeRole access to this role. Click Next.
- Add the permissions policy created above, and click Next.
- Enter a Role name, for example,
transfer-role, and click Create role. - Once successfully created, search for the created role in the Roles list, click the role name, and make a note of the ARN value. The final segment of this ARN must match the role name used for the database user in Step 1.
Step 4: Add your destination
Securely share your workgroup, host, database, your chosen schema, IAM role ARN, and staging bucket details with us to complete the connection.Permissions checklist
- Redshift Serverless database user
"IAMR:<role-name>"(or"IAM:<user-name>"for access key authentication) exists and hasCREATEandTEMPORARYon the database. If you pre-created the schema, ensureGRANT ALL ON SCHEMA <schema> TO "IAMR:<role-name>". - IAM role trust policy allows the data-syncing service to assume the role.
- IAM policy includes:
redshift-serverless:GetCredentialson your target workgroup ARN.- S3
ListBucketonarn:aws:s3:::BUCKET_NAME. - S3
GetObject,PutObject,DeleteObjectonarn:aws:s3:::BUCKET_NAME/*.
- Network allowlisting (if enforced) permits the egress IP/CIDR for the Redshift port (typically 5439).
FAQ
How is the Redshift Serverless connection secured?
How is the Redshift Serverless connection secured?
We use role-based authentication with your AWS IAM Role. We assume your role to obtain short-lived database credentials, and network access can be constrained by allowlisting the static egress IPs noted above.
Why is an S3 bucket required?
Why is an S3 bucket required?
Redshift’s high-throughput path loads data from S3 using
COPY. We stage files briefly in your bucket to maximize throughput and reliability. Files are cleaned up after load.Why is redshift-serverless:GetCredentials needed on the workgroup?
Why is redshift-serverless:GetCredentials needed on the workgroup?
In Serverless, temporary database credentials are issued per workgroup, so granting this action allows the assumed role to obtain ephemeral credentials without long-lived secrets.
What are the `oaud` vs `sub` IDs used for?
What are the `oaud` vs `sub` IDs used for?
These are identity claims used in the IAM trust policy when federating from GCP to AWS.
sub uniquely identifies our Google principal in federation. oaud is an additional claim used to bind role assumption to your organization.Why am I getting authentication errors with Redshift Serverless?
Why am I getting authentication errors with Redshift Serverless?
Common causes:
- Missing or incorrect permission on
redshift-serverless:GetCredentials(ensure it targets the correct workgroup ARN and region/account). - Trust policy mismatch (our principal is not permitted to assume your role).
- Using a provisioned cluster ARN and
redshift:GetClusterCredentialsinstead of the Serverless workgroup permission. - Database privileges granted to the wrong user.
- Propagation delay: IAM changes can take a few minutes to apply. Retry after 5-10 minutes.
Do I need to pre-create the schema?
Do I need to pre-create the schema?
No. The schema provided in the destination configuration is created automatically on first sync. If you pre-create it, grant
ALL on the schema to the writer user, and you may remove the database-level CREATE permission (retain TEMPORARY).